One of my favorite childhood puzzle games that I still enjoy playing is ‘Spot the difference’. In this game two versions of an image are shown side by side, and the player has to find differences between them. Depending on the difficulty level and the target age group, some of these games can be extremely challenging.
Just like any puzzle game, the purpose of ‘Spot the difference’ is to exercise the brain and have fun at the same time. But if you are struggling for the last 30 minutes, your eyes sore and the fun slowly ebbing away, it’s entirely acceptable to pull out the cheats bag. This is, of course, considering you do not have access to the answers. Otherwise you can just look at it.
To find differences between two images quickly you will need these:
Tools required: Adobe Photoshop
Time required: 1~2 minutes (or less)
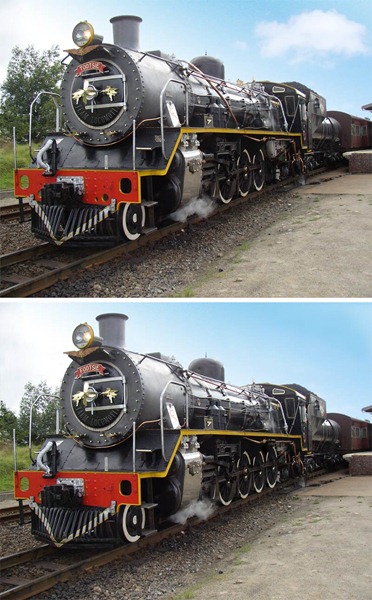
Fire up Photoshop and open the ‘Spot the difference’ image. Usually, both versions of the image are placed side-by-side (or vertically one above the other) and saved together as a single image. In this example, I have taken a ‘Spot the difference’ puzzle of, I would say - moderate difficulty, based on an actual image. Here it is. There are 12 differences in it.
Once you have this image opened in Photoshop, click on the rectangular marquee tool from the toolbar on the left (or press M) and with the mouse carefully select one version of the image.

Press CTRL+C to copy the selected region.
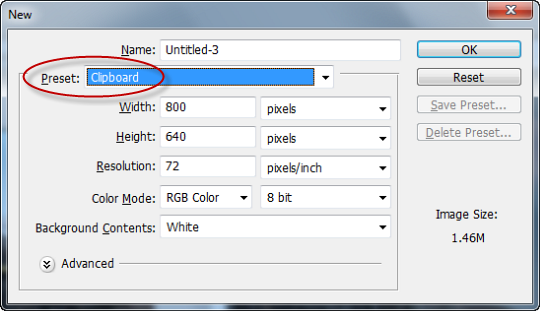
Create a new document. Make sure the Preset is set to Clipboard. Leave the document size untouched, and click OK.

Press CTRL+V to paste the copied region into the new document. The image should fit perfectly.
Return back to the original puzzle image. The selection is still there. Do not remove it. Press the down arrow key to move the rectangular marquee over the bottom image. Care should be taken to place the selection precisely over the second image. If you do a fine job here, you will have less work to do in the next step.
Press CTRL+C to copy the second image defined by the selected region.
Return back to the created document and press CTRL+V to paste it over the first image.
Click on the top layer and turn down the Opacity so that you can make out the layer on the bottom. If you selected the images carefully, both the images should be precisely aligned. If not use the arrow keys to nudge the top layer in the required directions to align.

At this point, you can already make out the differences between the two images. Grab the opacity slider and swiftly move it to-and-fro to see the changes that occur in the image. But this is not an ideal way. We will do better than relying on our ability to ‘see’ the changes. We will make the changes pop-out by itself.
Turn the Opacity of the top layer back to 100%. Then right click on the layer and choose Blending Options.

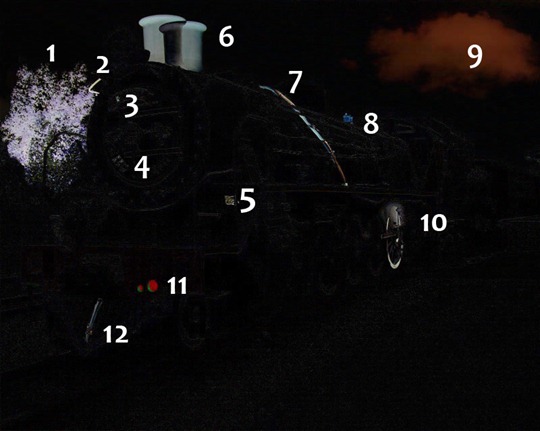
Under Blend mode choose ‘Differences’ from the drop-down menu.

The entire image will turn black and the differences will be highlighted. The 12 differences can be easily spotted as indicated by the markers.

If the images are not precisely aligned you will see something like this.

In this case, use the arrow keys to perfect the alignment. Sometimes it’s easier to align after you change the Blend mode to ‘differences’.
Here is another example puzzle.

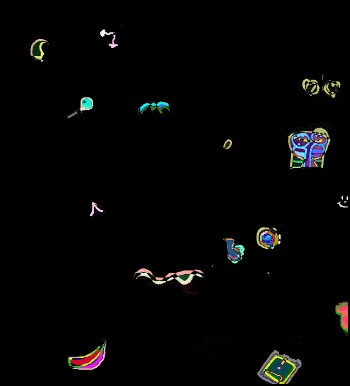
When processed using the above trick, the result I get is

I can count 15 differences in the puzzle.
Try this out yourself. You can solve any ‘Spot the difference’ game, no matter how hard, in under a minute or two.


 10:38 م
 ابن المفرق


0 التعليقات:
إرسال تعليق
أهلاً و سهلاً بكم، إرشيد الجرايدة يحييكم: